The short version: every railing comes down to three parts — top rail, posts, and infill — and how you combine them decides the look, the feel, and how well it holds up.
- Top rail (what your hand actually touches): our go-to is 2"×1" 11-gauge steel tube — code-compliant, comfortable for any hand, and thick enough to resist deflection, bending, and sag. A thicker rail beats cramming in extra posts.
- Posts (the legs): square, rectangular, cylindrical — or none at all (wall-mounted or returns). Square tubing pairs with almost any top rail; our contemporary default is a 2"×1" post.
- Infill (what fills the gaps): four standards — vertical picket, horizontal slat, cable (our most-requested), and no-infill — plus fully custom. Heads-up: no-infill is only allowed on handrails/stairs, never guardrails.
- Bottom line: mix and match to your space and style — we build it all, from standard to one-of-a-kind.
A railing consists of three main components: top rail, posts, and infill (or balusters).
Top Rail
We have worked with a wide variety of top rail types, styles, materials, and dimensions. We can work with steel, stainless steel, aluminum, brass, bronze. You name we’ll do it. Whether you are looking for a flat bar top rail, Victorian with an intricate design, or something more simple like pipe, or tube, we have you covered, and can get it to you in any color under the sun.
The most common top rail we work with and recommend, if you are still undecided, is the classic 2 inch by 1 inch (11 gauge) rectangular steel tube. This adheres to the 2025 California Residential Code and 2025 California Building Code while also providing a sleek minimalist look. One of the most common concerns that we receive about using this as a top rail is that it’s going to be too big, or too bulky for your hand. However, we’ve found this to be the most comfortable to hold as it conforms with the vast majority of hand types, everyone from your grandmother’s hand to one that’s able to palm a basketball; 2”x1” is the best suited.
2”x1” (11 gauge) steel tube is also the thickest standard tube carried by most suppliers. Why is this important? This thicker tube means there’s less likelihood of your handrail snapping… just kidding. The difference between 16 gauge and 11 gauge is pretty inconsequential when it comes to your handrail snapping. The purpose of using 11 gauge is for deflection, bending, and feel. When you weld something together, what you are essentially doing is fusing two objects into one using extreme heat. As we all know, heat has the ability to make things change, and in this particular case, deflect. To avoid getting side tracked: if you’d like to know more about welding and our capabilities, click here. When you use 16 gauge (which is around half the thickness of 11 gauge), you substantially increase the risk of this deflection.
The next risk associated with a thinner material is bending. A handrail is meant to take weight, if it can’t take your weight, what use is it? A thicker handrail means you have more resistance against it flexing under your weight. This is not to mention that not all flexing is temporary. Momentary flexing can easily lead into long temporary bending of your handrail. Not only does a handrail need to be able to support your weight, but it also needs to support its own weight; we refer to this as sag. When a handrail is too thin it begins to sag. Which is an overall safety concern, and aesthetic nightmare. There are two ways to counteract these forms of bending, you can either add more frequent posts, or just have a thicker top rail. You don’t want a handrail that needs an excessive amount of posts throughout its run, going with a thicker top rail is the overall winner. (It is important to note the infill of the railing can contribute to easing this concern, if you have vertical pickets this will add to the rigidity and prevent sag)
Lastly, feel. 11 gauge steel has a less hollow feel to it. It gives the handrail a more substantial presence within your hand. You can tell that it’s not flimsy. It feels, and is, structurally sound. Exactly as a handrail should feel.
Now with all this being said, we have experience in almost every style of railing and have worked with many different types of top rails. If you have a design that doesn’t involve this style that’s perfectly fine and completely doable. Honestly, the more unique the handrail, or guardrail you want, the better. We love making cool and interesting designs a reality, and if you don’t know what you want yet, don’t worry! We’re here to help you through the entire process, if you’d like to learn more about our process click here!
Posts
Posts can come in many forms. Square, rectangular, cylindrical, and sometimes you don’t even need them depending on the environment (wall mounting and returns). Posts are the legs of a railing. They support the top rail, adhere to mounting conditions, and frame the infill. The main determining factors when choosing what style post to go with comes down to mounting conditions, and aesthetics.
For example, if you are using a 1.5” outside diameter pipe top rail, you probably wouldn’t want to go with a 2”x1” post. Rectangular posts and cylindrical top rails don’t usually match well with each other, but for some reason a rectangular top rail can go with cylindrical posts. The great unifier of posts that suits well with basically all top rails is square tubing. Square tubing (like 1”x1”, or 1.5”x1.5”) can harmonize elegantly with flat bar (if the width of the square post is equal to or less than the top rail), pipe (if the outside diameter matches the width of the tubing), and rectangular tubing (when centered). But don’t let this deter, or limit you from choosing a certain combination. Weird is wonderful. If you have an idea that steps outside this box, let us know, we do custom railings, everything is on the table.
If you are looking for a contemporary design, our classic for posts is 2”x1” (11 gauge) steel tube (underneath a 2”x1” top rail). For whatever reason, no other metal fabricators / railing companies use this as a post, instead opting for a 2”x2” post.
Obviously the style of post you will want to use will vary based on what you want for your top rail, and your aesthetic vision, but obscures your view while oftentimes taking up unnecessary space. We’ve made use of them in the past:
Sometimes it’s necessary, and blends nicely with the environment, but we typically like to opt for this.
Infill / Baluster Type
There are four standard types of infill:
1. Vertical Picket:
This can come in a few different varieties. Ornamental, which contains a design of some sort, standard vertical pickets, and pipe.
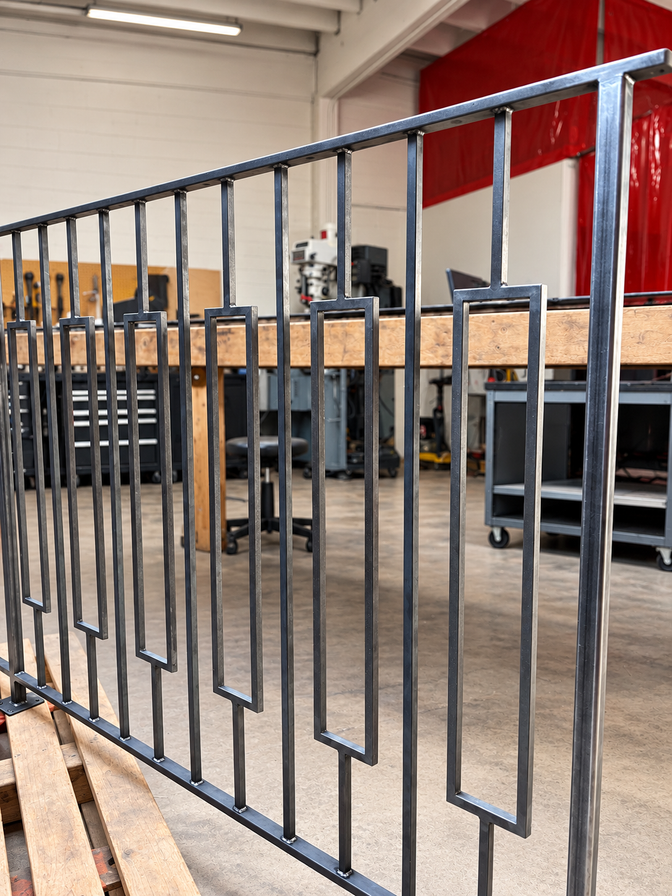
Vertical pickets add a lot of rigidity to a railing, essentially acting as a series of tiny posts throughout the railing. This doesn’t mean that you need less posts, instead, it means that you have less sag throughout the run of your railing. In the example made in the Top Rail section, if you were using vertical pickets as an infill, we would probably opt to use 2”x1” (14 gauge) instead of the 11 gauge. Vertical pickets are also unique to other styles of infill because they require a bottom rail / bar to attach to. This bottom rail can come in many different forms: flat bar, square bar, rectangular tube, and pipe. It really depends on the purpose and vision for the railing.
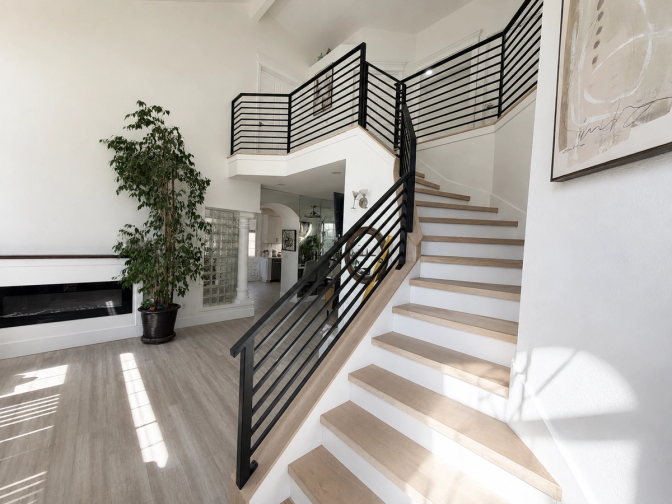
2. Horizontal Slat
This can be made out of anything you’d like, the most common we’ve encountered is square and rectangular tubing. Typically matching the style of the top rail, only ever differing in size.
3. Cable
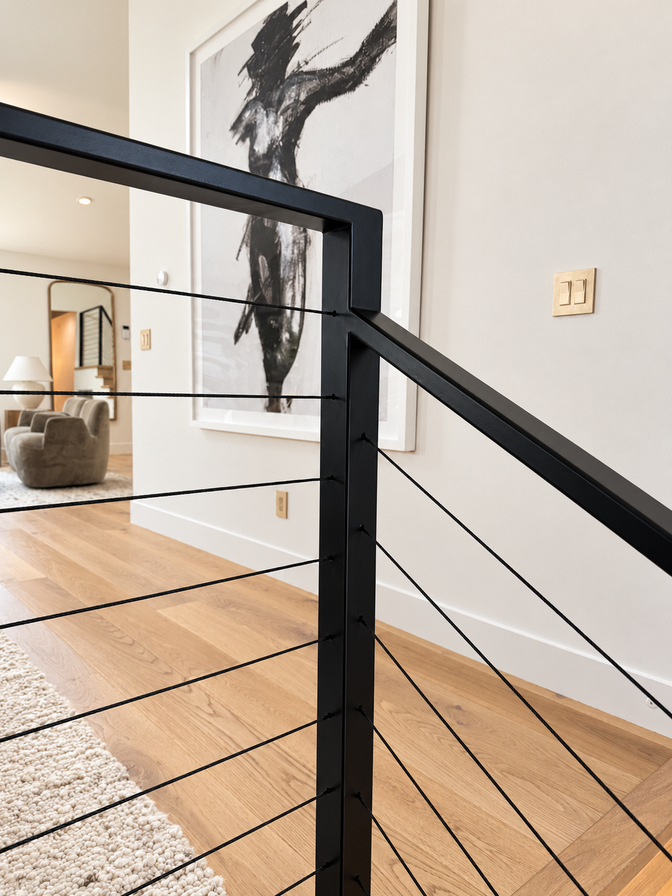
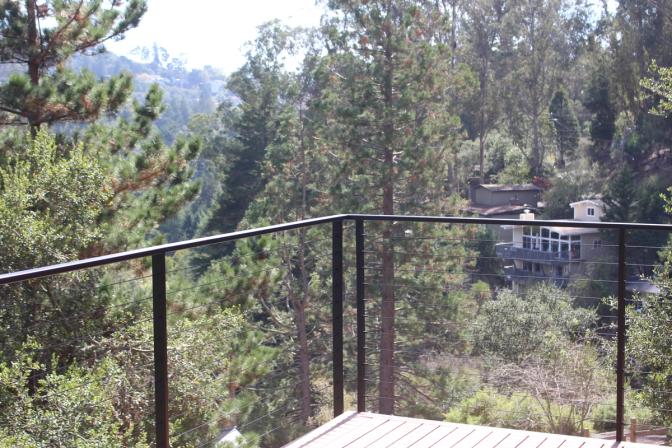
Cable rail is the most common request we receive. Cable infill goes best with a rectangular post and top rail combination. It blends seamlessly into the environment, offering the most modern look for guardrails and handrails alike.
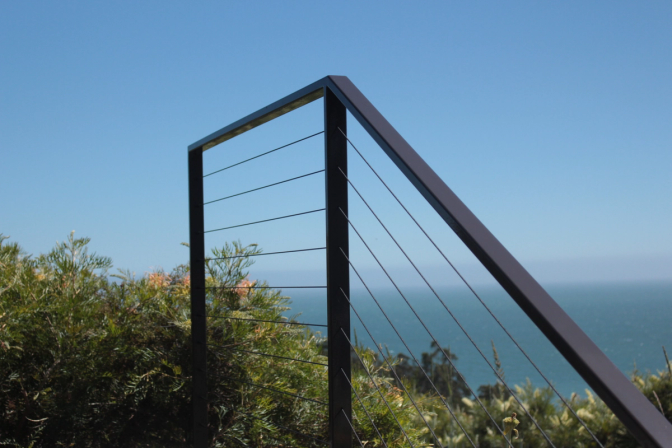
If you’d like a deeper dive into cable rail and how we differ from the competition, click here!
4. No Infill (Traditional Top Rail)
No infill can be taken two different ways. It can be a traditional top rail that has returns and is wall mounted:
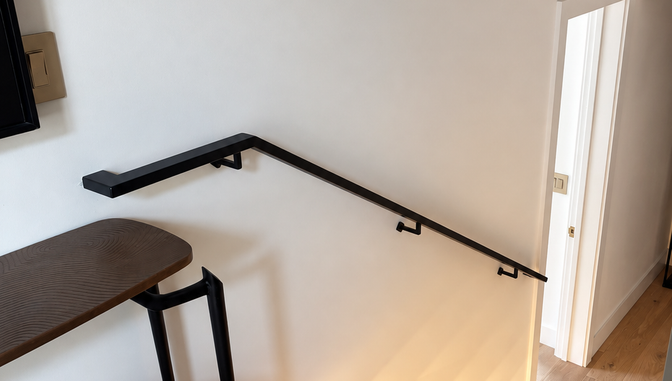
Or as a handrail with posts, but nothing filling the space in between:
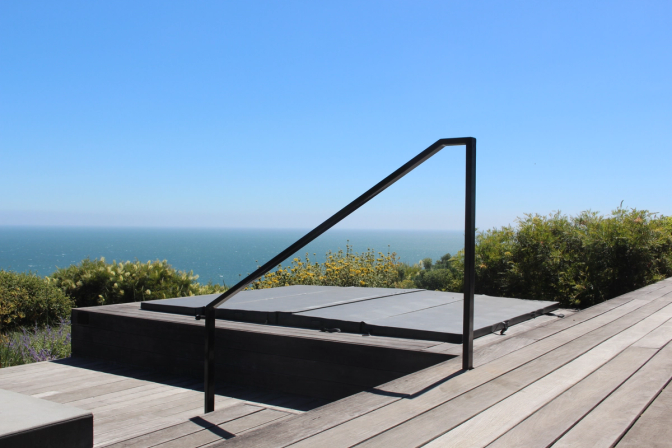
For the latter, no infill is the only thing that beats cable rail when it comes to maintaining your view. However, it comes with a few drawbacks. You need an infill for a guardrail. (If you are confused about handrails and guardrails, don’t worry we have you covered, click here for our in-depth analysis of the code, definitions, and clearing up any and all misconceptions) The gist of it is, you rarely ever encounter a situation, unless you are ascending with the slope of a hill, where you aren’t required to have an infill. You can only have no infill for stair rails, and handrails, never for guardrails. Which is why people often opt for using cable.
5. Custom
We make railings, and this can extend beyond the general imagery conjured by the mind.
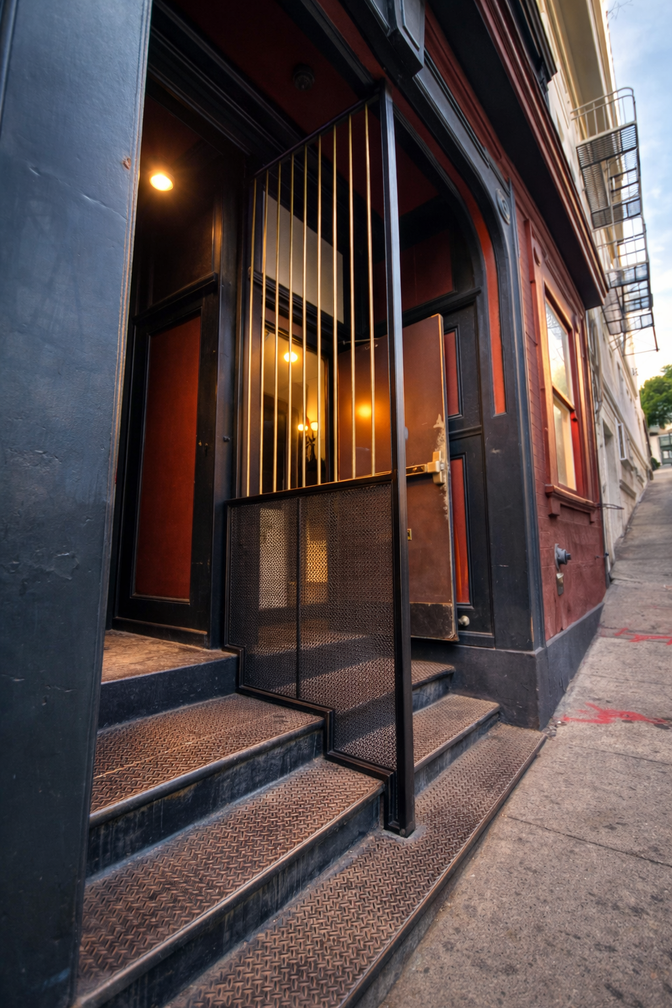
I wasn’t lying when I said that it can be whatever you want. Whether you want something traditional, modern, or like nowhere else out there, we have you covered. If you made it this far thank you for reading. Like our work, I put every ounce of passion into writing this. Feel free to reach out with any and all questions.